Introduction
There are two methods to get the data your need from Cloudpay, the Report screen or the Data Extract screen. The report screen has a wide selection or pre-written reports that you can use. If you can not find the report you are looking for in the Report screen, then you can create your own output using the Data Extract screen.
The Data extract screen can save up to ten report layouts and data is exported using the CSV file format. This can be opened in spreadsheet applications, like Excel.
The Report screen has many pre-written reports that you can save as PDFs.
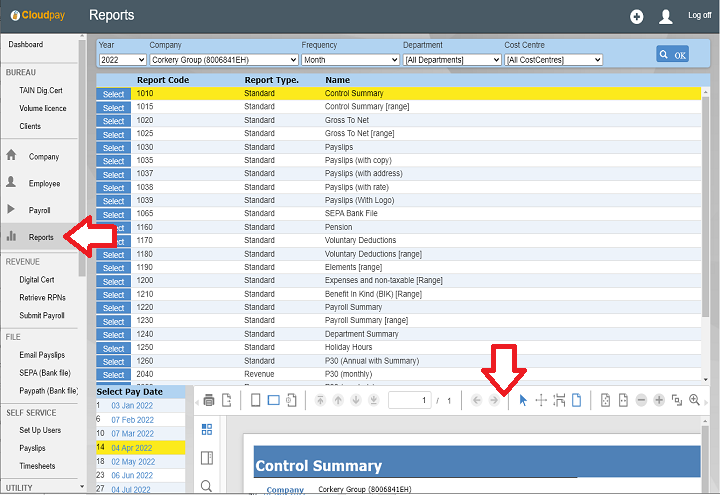
Reports Screen
The report screen has a list of reports. When a report is selected, it appears below the list of reports. You may have to scroll your browser screen to see it.
Select the pay date in the Calendar displayed next to the report to see the data for that pay date. If you have selected a Payment Frequency, Cost Centre and/or Department at the top of the reports screen, this may filter the data that is displayed for some reports.
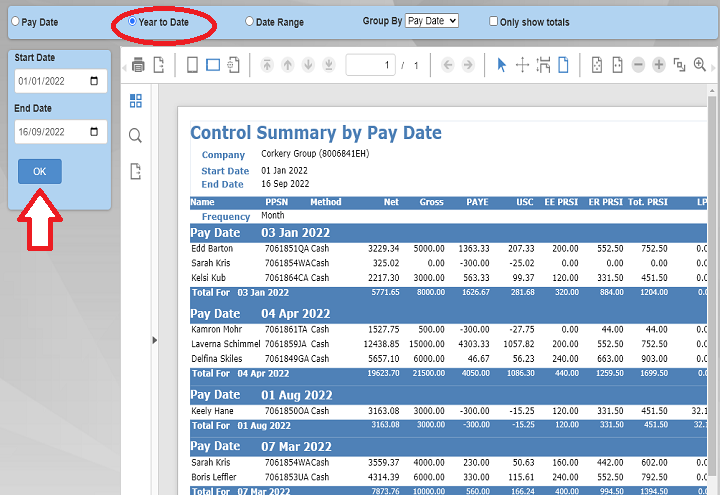
Reports with a Date Range
Some reports have the facility for you to enter a date range. Typically, these have [range] written after the report name in the list. You can select the following:
- Pay date
- Year to Date
- Date Range
Alternatively, the Start Date and End Date can be overwitten to whatever range you would like to report on. Click 'OK' to display the data
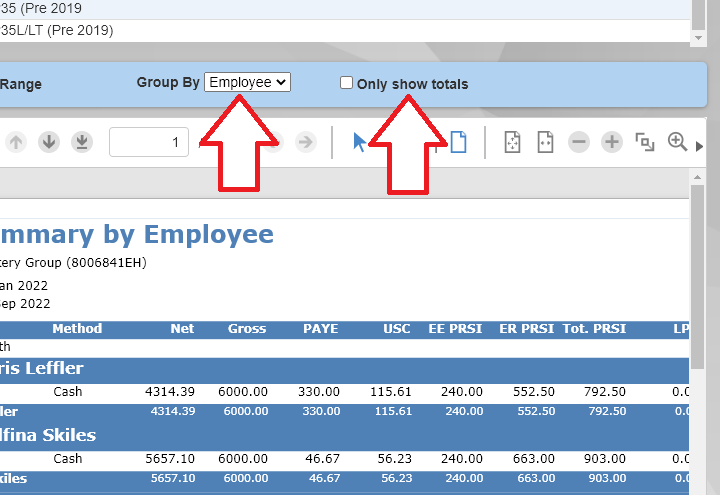
Grouping and Totals
Range reports can be grouped by either Pay Date or Employee. A report that is grouped by Employee will look like this:
Employee: Boris Leffler
3 Jan 2022 200.00
7 Feb 2022 150.00
7 Mar 2022 300.00
Total for Boris Leffler 650.00
-----------------------------------
Employee: Edd Barton
3 Jan 2022 200.00<
7 Feb 2022 250.00
7 Mar 2022 350.00
Total for Boris Leffler 800.00
--------------------------------------
If the grouping was by Pay Date, it would look like this instead:
Pay date 3 Jan 2022
Boris Leffler 200.00
Edd Barton 200.00
Total for 3 Jan 2022: 400.00
---------------------------
Pay date 7 Feb 2022
Boris Leffler 150.00
Edd Barton 250.00
Total for 7 Feb 2022: 400.00
----------------------------
Pay date 7 Mar 2022
Boris Leffler 300.00
Edd Barton 350.00
Total for 7 Mar 2022: 650.00
If you tick the 'Show Totals' check box, only the group totals are displayed and the details are hidden.
Saving Reports
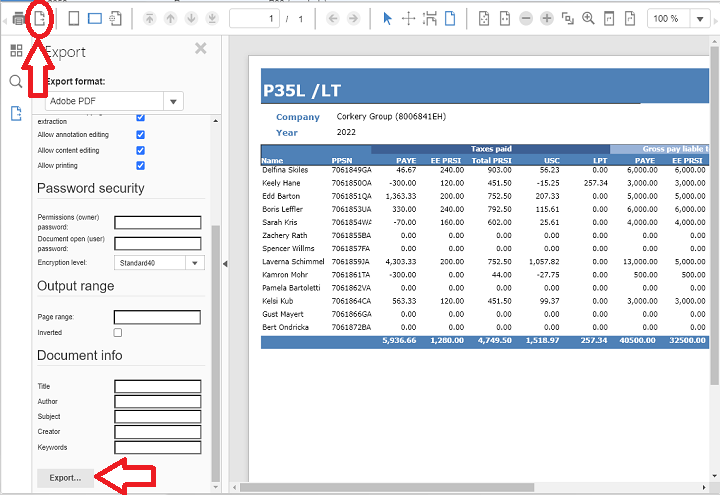
Reports can be saved in many different formats. On the report menu bar, at the top left, next to the print icon is the Export button. Click this to expose the export blade.
Please refer the image opposite to see where the Export button is, circled in red.
The most common format to export the report in is Adobe PDF. Excel can also be selected, but the report may not be formatted very well as the export tries to preserve the design of the report. Column headings may now align correctly. To export the data in the report to Excel, use the Data Extract facility instead.
Click the Export button at the bottom to save the report. You may have to scroll down to see this.
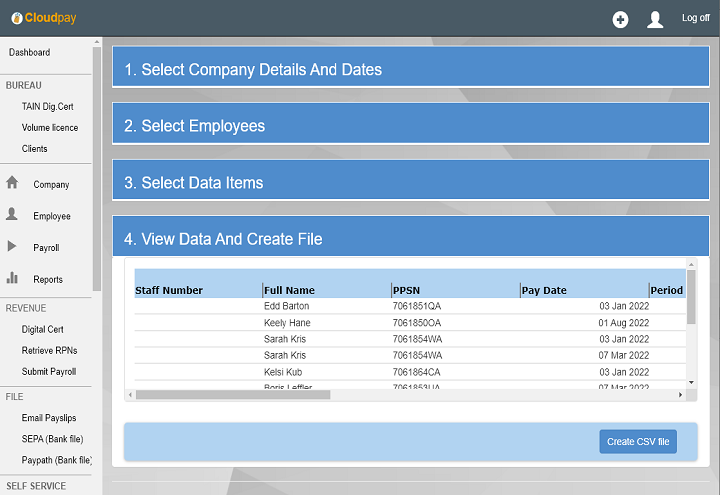
Data Extract Utility
Cloudpay has a data extract utility where you can select which fields you which to appear in a report. The fields are arranged in four group:
- Employee: These are related the employee. Such as Name, Address, PPS Number etc.
- Payment: When you process a payment, these fields are used, such as Gross Pay, Pay date, net pay etc.
- Elements: Any additions to the pay set up by the users in the Elements grid, such as Expenses, Maternity pay etc
- Deductions: Any deductions to the pay set up by the users in the deductions grid, such as Pensions, Loans etc
All employees can be extracted for the output, or just a selection. You can also specify departments, cost centres and date ranges.
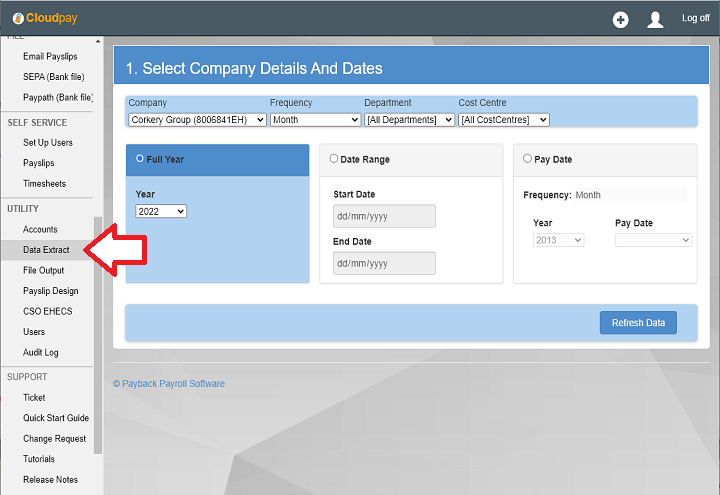
Filtering the Data
Use the filter drop downs (Company, pay frequency, cost centre and department) at the top of the extract screen to select the data you require.
You can also select date ranges or a single pay date. Note that for larger date ranges (eg, a full year) it will take longer to load the data. Only select the date range that you require.
Then click the 'Refresh Data' button
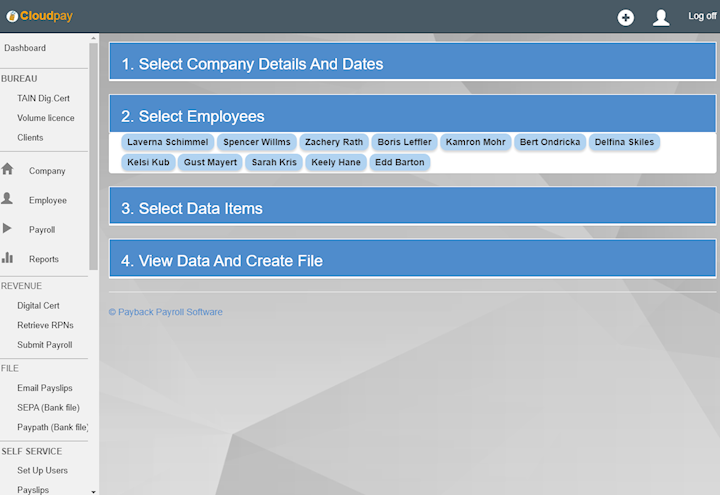
Select the employees
The next step is to select the employees.
Click on the employee 'Bubble' to select or to deselect them. The bubble will turn blue to indicate the employee is selected, and grey for not selected.
Employees displayed in Grey will not appear in the report.
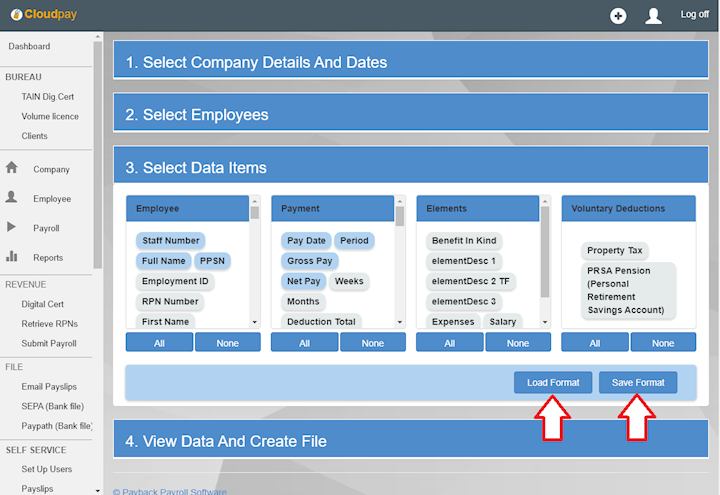
Choose the Data Fields
In a similar way to the way the employees were selected, you can choose the data fields.
At the bottom of each group are 'All' and 'None' buttons. Clicking these will either select all the data items in the group or make it so that no data items are selected.
Note that if there is a great deal of data, for example there a lots of employees and you are extracting all pay dates for the year, then it will take longer to retrieve the data.
Saving your Selection
If you need to extract the same data after each pay run, you can save your field selection. The next time you use the data extract utility, you can load your pre-set selection so that you do not have to keep selecting the fields.
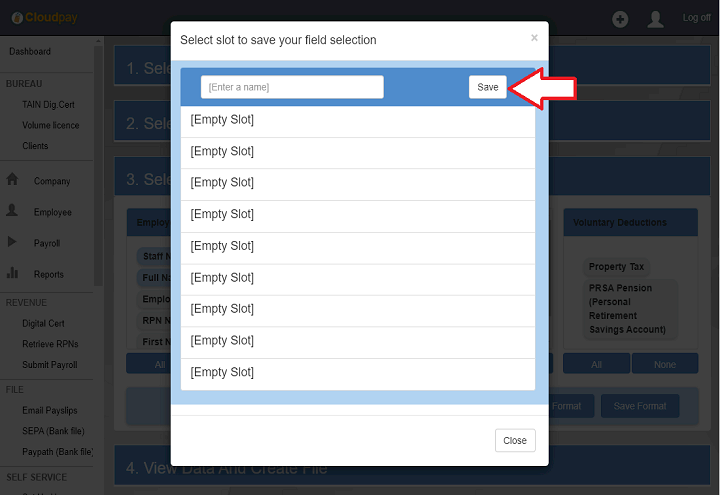
To save a field selection, click the 'Save Format' button. A save dialogue will appear with ten empty slots. Click on one of them and enter a description, or name for your selection.
Then click the 'Save' button. (The save button changes to 'Overwrite' if you select a slot that is already in use)
Loading a previously saved selection
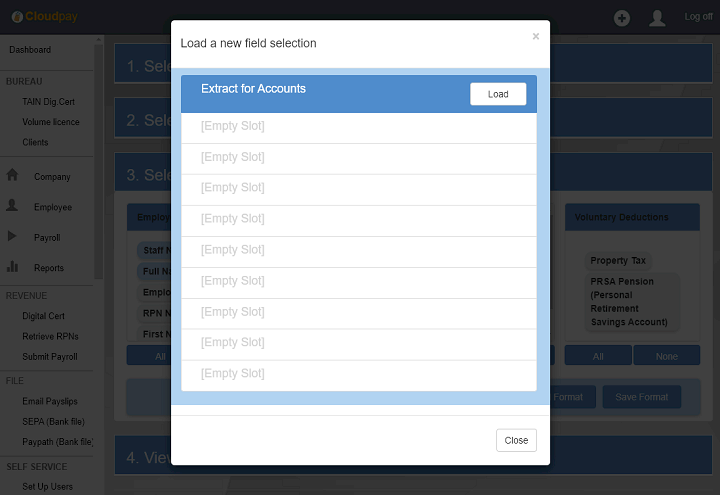
If you have previously saved a field selection, this can be recalled by click the 'Load Format' button.
This works in a similar way to the Save Dialogue. Click on the Slot you wish to load and it will turn blue. Then click the Load button that appears to the right.
Note that the more data you are selecting, the longer the load will take
Saving your Data
The last step is to save your data.
The data will be saved in a CSV format. CSV stands for Comma Separated Values. This format can be used by any spreadsheet application and many other third party products like accounts, costing or personnel software.
Click 'Create CSV File' to save your data.