Retrieving RPNs
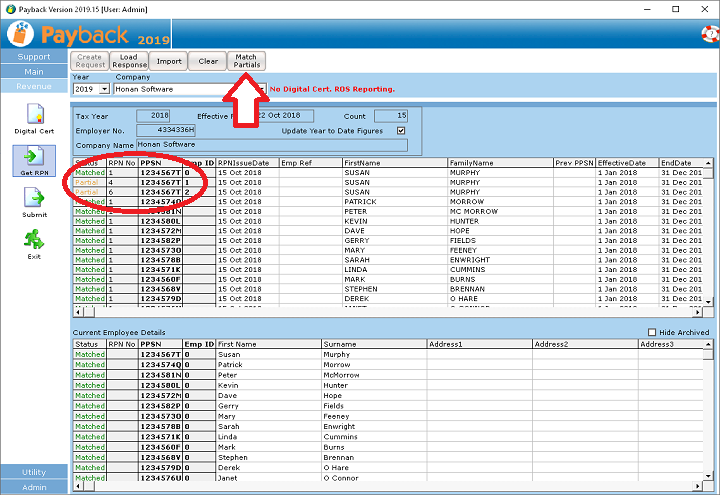
In the RPN screen, Click the Retrieve button to retrieve the RPNs from the Revenue server. If you see records with an orange Partial next to them, this means that there is more than one RPN available for the employee on the Revenue server. Each RPN refers to specific employment ID for the employee.
In the example opposite, Susan Murphy has three RPNs available on the Revenue server. She has an RPN for each of the three employment IDs of 0, 1 and 2
Click here to find out more about what employment ID are and how they work: https://www.payback.ie/support/paye-modernisation/employmentid-explained/
If all the retrieved records are have a status of green Matched, then you do not have any partials and do not have to use this utility. Otherwise, click the Match Partials button as shown opposite.
Using the utility
The Partial Match dialogue will appear. In it will be listed all of your employees who have more than one RPN available.
The object of this utility is to assign the correct RPN to each of your employees so that their tax calculations will be correct. Some of the listed RPNs may be on the Revenue Server in Error. Revenue will not remove these records, even if they are wrong.
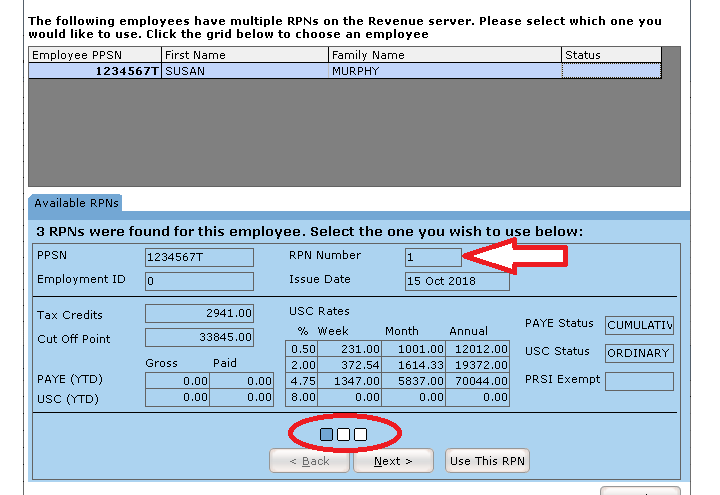
Select the first employee by clicking them on the grid. In this example we only have one employee with partial matches.
Note that each RPN has its own RPN number (arrow opposite) and each RPN is represented by a box (circled opposite). In this case Susan has three available RPNs and we are currently looking at RPN number 1.
Selecting the correct RPN
Click the Next > button to see the next available RPN for the selected employee. Click the < Back button to view the previous one. See the way that the filled box changes as we click the next and back buttons.
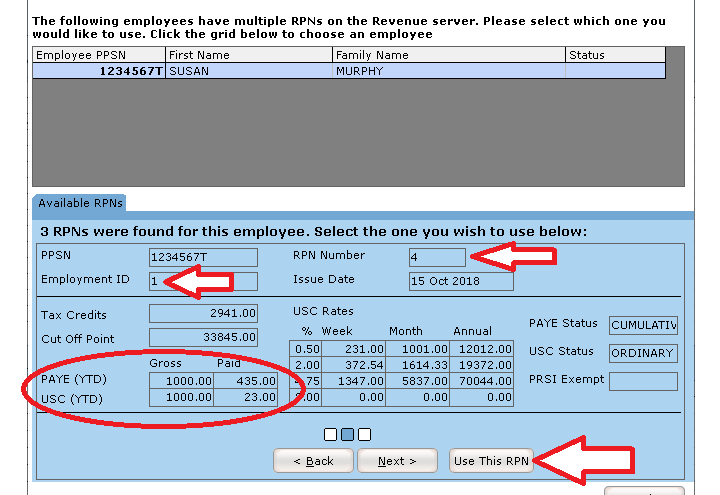
For this example, we know that Susan worked somewhere else. RPN number 4 is the only one with Year to Date figures from her previous employment, so we decide that this is the correct RPN to use for her.
We click the Use this RPN button.
What happens when you select an RPN
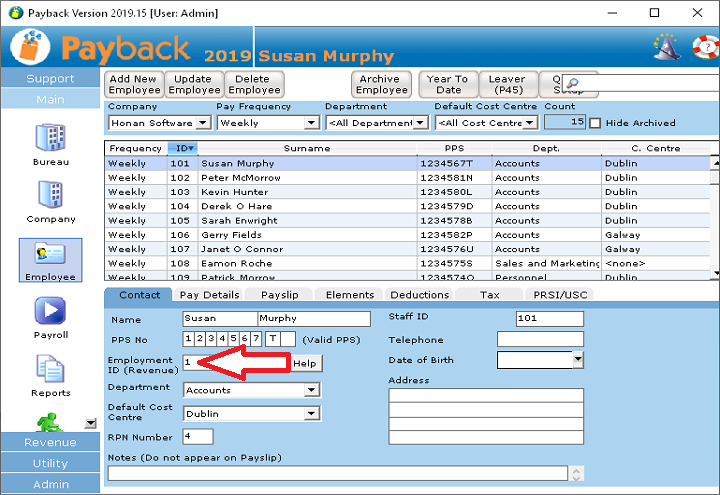
When you select an RPN by clicking the Use this RPN button, the employment ID for the employee is updated to that of the selected RPN. You can see opposite that Susan's employment ID has been updated to 1 (it was 0 before)
Then all the new tax details - tax credits, USC information, LPT etc. is imported for the employee.
If the employee worked somewhere else during the year, then their year to date figures are also imported (if these are available and are in the RPN)
You can check the Year to Date figures by clicking on the Year To Date button in the employee screen and then select the P45 tab.
Download a Free Trial
Get started with a free trial. You can process two full payments and be confident that Payback does everything you require at no risk.