Introduction
As well as being able to print and email payslips, Cloudpay also has a Self Service option. This allows employees to log into the Self Service portal and view their payslips online, using any device with a web browser.
The employee can also print their own payslips if they so wish, using the self service portal.
Enable Self Service
If you want employees to be able to view their payslips online, you first have to enable the Self Service facility in Cloudpay.
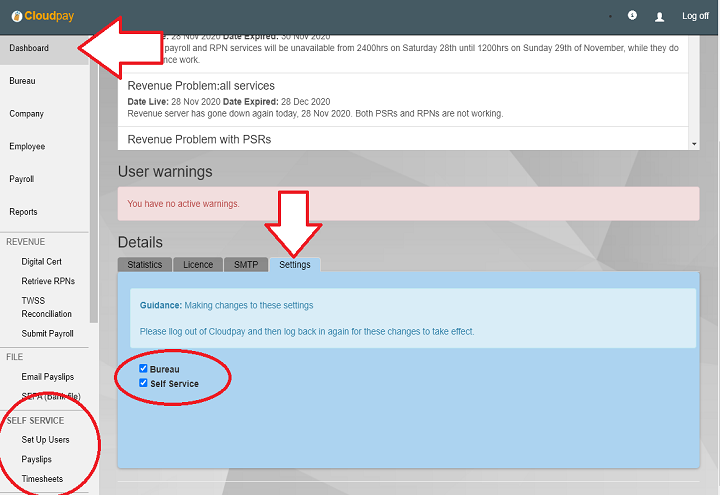
You can do this from your Dashboard screen: https://www.cloudpay.ie/Dashboard
Select the Settings tab and tick the Self Service box.
You will have to log out of Cloudpay and then log back in again for this change to take effect. Once you have done this, you'll see a new 'Self Service' menu section at the left of the screen.
Enter employee email addresses
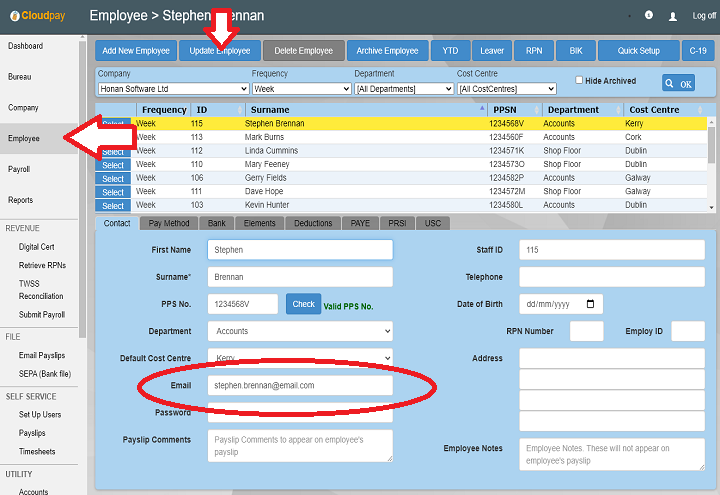
Each employee that wished to avail of Self Service must have a self service account set up so that they can securely view their payslips.
The first step is to enter a valid email address for each employee in the Contact tab of the https://www.cloudpay.ie/Employee screen.
Click Update Employee after you've entered each email address.
Administer Users
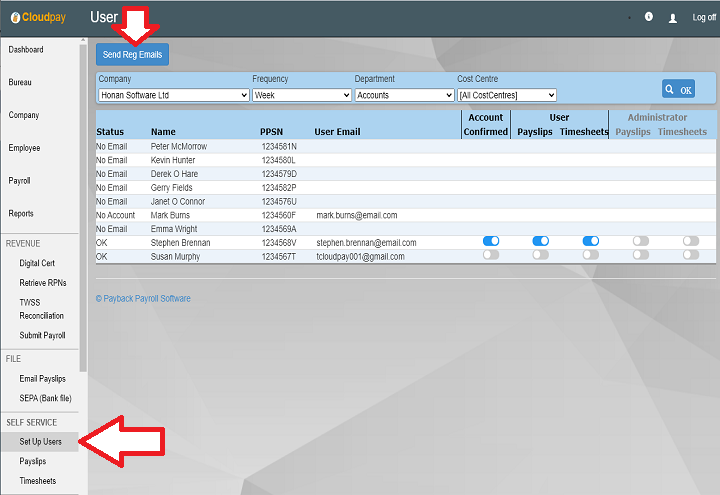
Next you will have to send emails to your employees so that they can set up their Self Service accounts with passwords that only they know.
Click the Set up users option under the Self Service menu to to this: https://www.cloudpay.ie/SelfService/UserLogin
Notice that there are three Status for the employee. These are:
- No Email - This means that you have not yet entered an email address for the employee in the employee screen.
- No Account - You have entered an email address, but the employee has yet to confirm their Self Service account.
- OK - Everything is okay with this employee's account.
To send registration emails to employees so that they can set up their account, click the 'Send Reg Emails' button at the top of the screen. All employees that have a status of No Account will receive an email allowing them to register their self service account. When they have done this, their status will change to OK
The final step in the account set up process is to select the slider in the Payslips column in the grid to enable access for them to view their payslips.
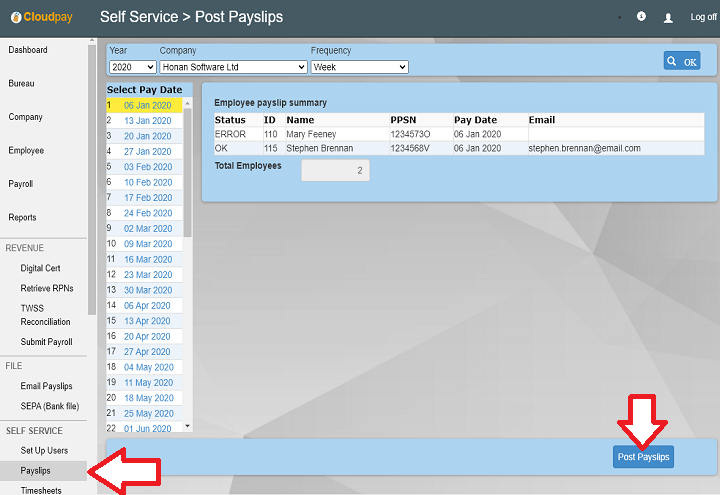
Post the Payslips
To make the payslips available to employees, you have to post them to self service. To do this go to the https://www.cloudpay.ie/SelfService/Payslips screen.
All processed payments are listed for the selected pay date. Click the Post Payslips button to send them to Self Service.
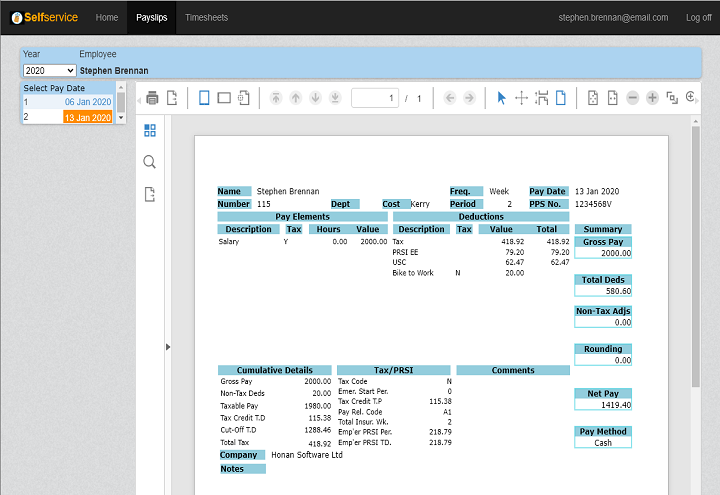
Employee logs in
The Employees should use this address to view their pay slips that you have posted.
They should log into their accounts using the user name and password they used to set up the self service account.

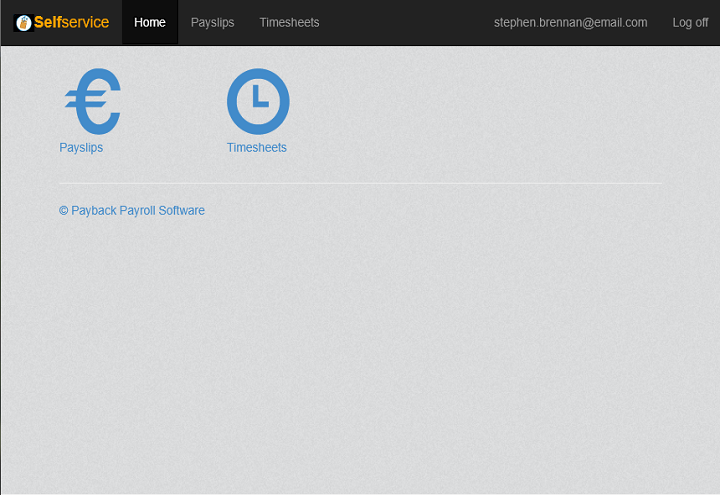
Self service menu
When the employee logs in, they will see the Self Service menu. Depending on what permissions were selected in the https://www.cloudpay.ie/SelfService/UserLogin screen, they will either see the Payslips, Timesheets or both options.
The employee should select the Payslips option to view posted payslips.
Viewing the posted payslips
The employee can now see all of their posted payslips.
Select the date in the calendar to view the payslip issued for that date.
If you change or rewind a payment in Cloudpay, this automatically updates the self service payslip.