Introduction
Revenue instruct that after each payroll is processed, data must be submitted to their server. When you make a payroll submission to the Revenue server, you will receive information about the submission and if there were any problems with it. This shows you what information you can expect to receive.
To make payroll submissions, you first must has processed all the payments for the pay date in the Payroll screen, and have assigned a valid digital certificate in Digital Certificate screen.
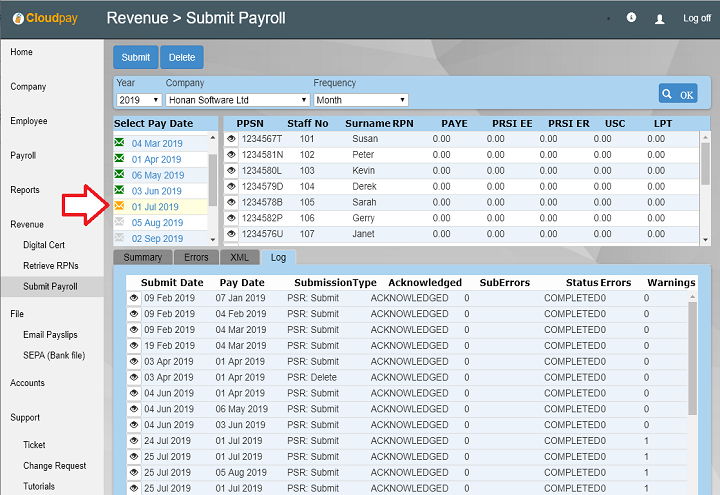
The Revenue Payroll Submission screen looks similar to the Payroll processing screen. At the top of the screen are two buttons. The Submit button sends data to the Revenue server for the currently selected pay date (replacing any data that make have been previously uploaded) and the Delete button deletes any data that has been send for the currently selected pay date.
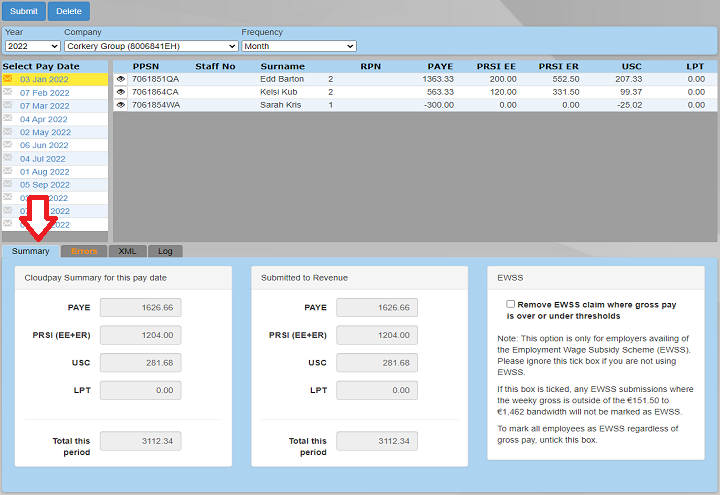
Summary Tab
The Summary tab provides the total tax liability submitted to Revenue. For successful submissions the figures in the Cloudpay Summary for this pay date panel matches the Submitted to Revenue panel
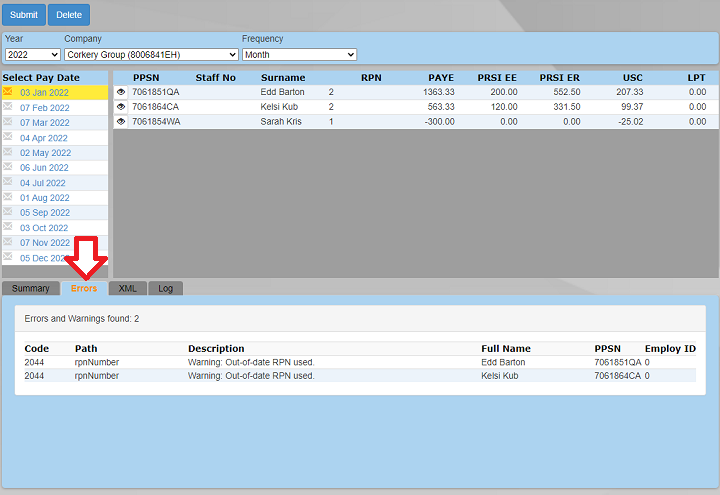
Errors Tab
If there are any errors or warnings with the submission, these will appear in this tab.
For submissions that uploaded with no issues, the text on the tab will appear in the same way as the other tabs. However, if there were any errors or warnings with the submission, then the tab text is displayed as bold orange to draw the user's attention.
Note that for warnings, the submission may still have gone through successfully. It is up to the user to correct any problems so that the next submission goes through without any issues.
Check the Summary tab that the figures match to insure that the submission successfully went through.
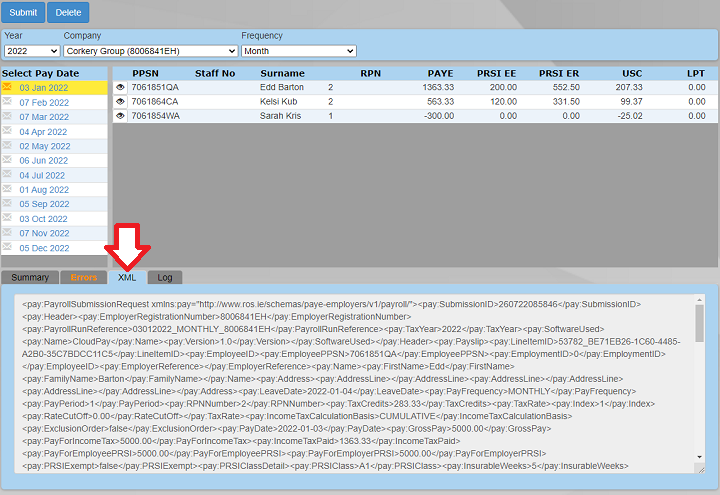
XML Tab
The XML tab contains the message that is sent to Revenue. It is XML (Extensible Markup Language) format. This can be read by both humans and computers.
The text can be copy and pasted from the XML tab into a text editor, if the user wishes to upload the submission manually in ROS.
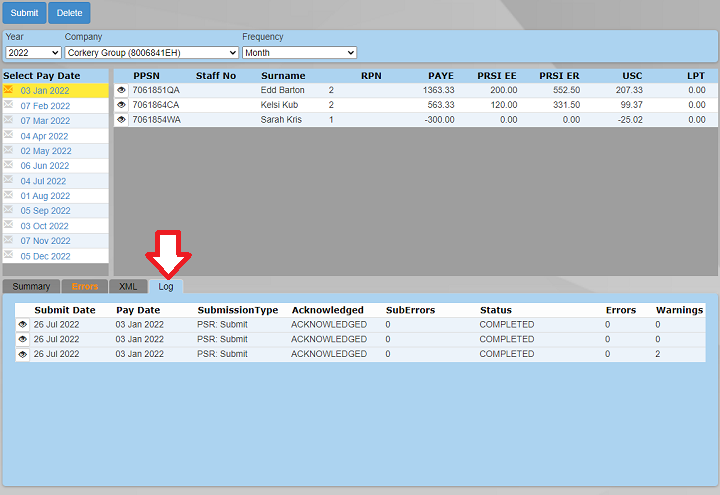
Log Tab
Every time a submission is submitted or deleted, this is logged by Cloudpay. The log tab lists all submissions and deletions made for the currently selected company and year.
What the envelopes mean
When you click the Submit button, the colour of the envelope next to the pay date may change colour.
Green means that the submission went through and was accepted by Revenue without any warnings or other problems.
If the envelope is orange, it means the submission went through, but with warnings such as an RPN being old, or no PPSN being supplied.
Red means that the submission may not have gone through, maybe because a PPS number was wrong.
Grey (envelope did not change colour) can mean that the the status hasn't yet been updated on the Revenue server, or the submission hasn't yet been submitted.
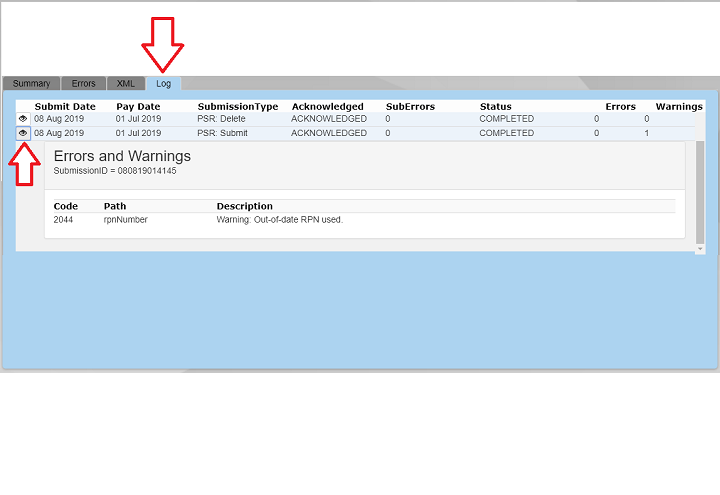
Warnings and Errors
If the envleope turns orange or red, you can check the reason by clicking on the log tab in the submission screen, and then click on the eye symbol next to the submission.
In the example opposite, an out of date RPN was used. As this was a warning (orange envelope) the submission went through.
You can also use the Errors tab to check the currently selected pay date.
Notes
- An easy way to check that the submission went through is that the 'Revenue' figures match the 'CloudPay ' figures in the summary tab of the submission screen.
- If the envelope stays grey after you've clicked the submit button, this could mean the that submission is Pending. This can happen if the Revenue server is busy. Please wait a while and click the pay data again in the submission screen and see if the 'Submitted to Revenue' figures update.
- All submissions can be checked by logging into your ROS account.